(continued from Name List Only)
In the section on setting up of Service Status, mention was made of Optional Services. Optional services can be included and output on messages in two different ways:
The control of where the optional service detail is output on a message is in the message set up screen.
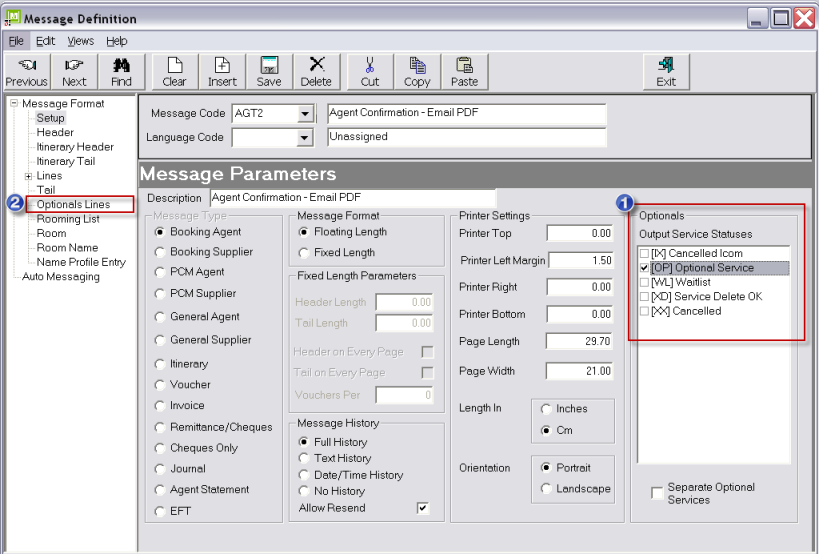
Screen Shot 220: Message Setup Screen–Optional Services
|
|
Those Service Statuses which have been set up with the Include in Booking Total checkbox unset (i.e. don’t include services with this status in the booking total—see Service Status) will display in the Optionals section of this screen. |
The Optionals section in the Message Setup Parameters screen is used to control two aspects of Optionals messaging; Which optional services (by service status) are to be output and whether the services are to be incorporated in the main body of the message or separated out into a tail sub section.
Output Service Statuses (Multi Select List Box)
In Screen Shot 220: Message Setup Screen–Optional Services, the service status OP has been checked  . This indicates that services with that status will be included in the message output.
Separate Optional Services (Checkbox)
When left unchecked, any services with status OP will be included in the main body of the message in a format defined under the Optional Lines node in the message definition Tree Menu.
The section marked  allows a subset of line formats to be defined which will be used for message output only when services have a status that is a) an optional (non-included cost) type of status and b) is checked in the message parameters setup screen.
To create an optionals lines section, click on the Optionals Lines menu node and then click the Insert button in the button bar. The New Line Section dialogue will display.
Screen Shot 221: Insert Optional Lines Section
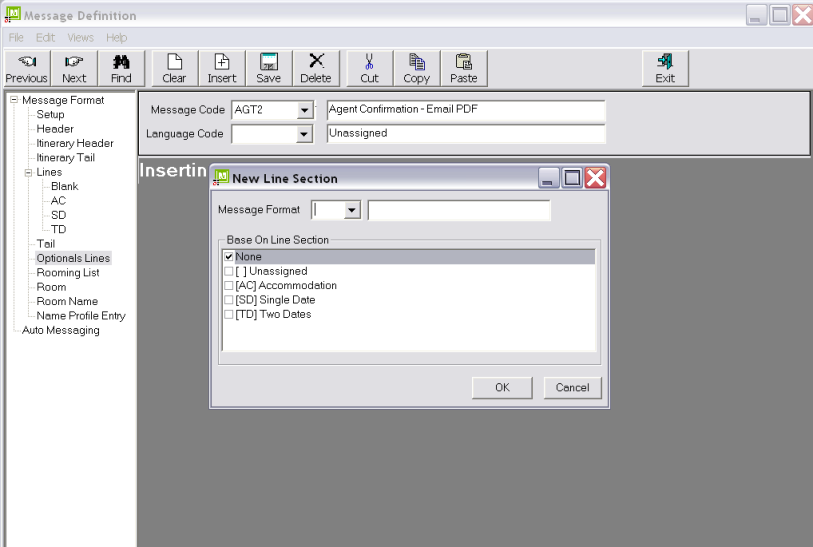
The adding of Optional lines is by selecting the appropriate line type.
|
|
The setting of Optional Line types is no different to setting up standard message lines as discussed under the Lines Section. It is possible that not all line types will be used for optionals—it may only be sightseeing excursion and Waitlist accommodation that are to be output, in which case only the two appropriate line types would need to be set up. |
|
|
The format already set up under the Lines Section can be copied to an Optionals Line Type. Select the Message Format Type being set up as an Optional Line from the drop-down in the New Line Section dialogue and then check the Line Type to be copied from in the Base On Line Section list box. |
Example 131: Optional Service Single Date Line Type

<locd>Service location description
<optn>Product Description/Name.
<agent>Service agent price. pp = Per Person, :ad = Adult Rate, :ch = Child Rate
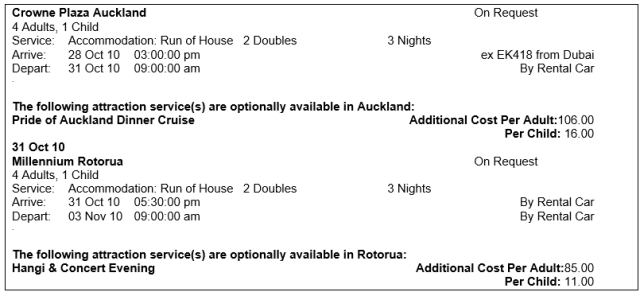
Example 132: Optional Service Single Date Line Type Output
|
|
Example 132: Optional Service Single Date Line Type Output is showing the Optional services (in bold) as part of the main body of the message, interspersed between other services. |
Optionals Header Section
Screen Shot 222: Message Setup–Separate Optional Services

When the Separate Optional Services checkbox is checked, an additional menu node Optionals Header becomes available and the Optionals Lines section is a sub node below it.
The Optionals Header section allows text to be entered which will precede the list of Optional Services when output in the message.
Example 133: Optional Services Header Output

The Optionals Lines section will be output immediately below the Optionals Header section.
Example 134: Optional Services Header

The messaging code <section:options> must be put in either the Message Header or Message Tail in the position that the Optional Services are to be output.
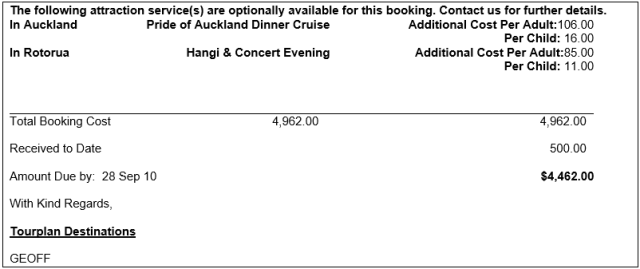
In Example 136: Section: Options Tail Output below, the <section:options> tag has been placed at the top of the tail so details of any Optional services will be output beneath the list of included services and the itinerary tail, but before the message tail.
Example 135: Section: Options Tail
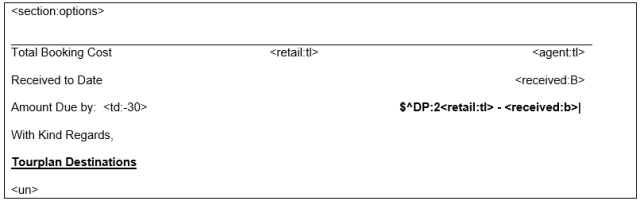
Example 136: Section: Options Tail Output
 Tourplan iS V2.07 System Setup Training Guide
